To customize items in the Custom menu tool bar, you will use the Custom menu element:
The → leads to the Custom Menu Editor. The Load new item allows you to load a new menu in case you have directly changed the custom_menu file located in the .bluefish directory within your HOME directory, while Reset item allows you to return to the default custom menu under the same circumstances.
The custom_menu file is created upon install Bluefish and corresponds to some default entries, the ones you can see in the Custom menu tool bar. These will give you an idea what can be done with the custom menu.
The custom menu operates only on elements of the Custom menu tool bar, and allows you to:
add "often used" items to an existing menu
search and replace patterns to the Replace menu
create new menus
The Custom Menu Editor is the place where you make all changes to the custom menu. The location for entries in the custom menu is defined by their menu path in the Custom Menu Editor:
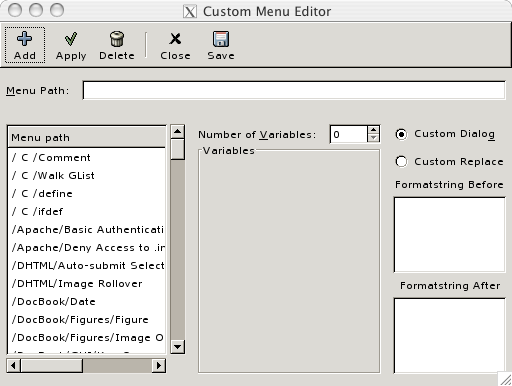
It has four parts:
The top one with all action buttons:
Add which adds new menu entries, once all necessary fields have been filled in
Apply which applies changes to an existing menu entry, once it has been edited
Delete which deletes the menu entry currently selected in the Menu path list
Close which discards changes
Save which saves the changes and exit the editor
The Menu Path field below the buttons, to enter either an existing or a new menu path
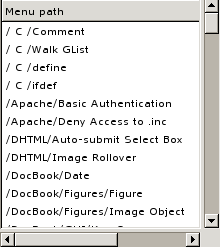
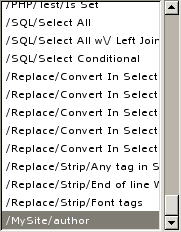
The Menu path list on the left side, which lists existing menu paths. A menu path looks like /Main menu/submenu/item or /Main menu/item. Here's an extract of the default custom menu paths:
A custom part on the right side, whose contents changes depending of the type of menu. There are two types of items in the Custom Menu Editor:
The most simple custom dialog item has a menupath, for example /MySite/author, and a Formatstring before, for example written by Olivier. If you add this item, you can add this string by selecting the menu item.
Procedure VII.2. Adding a custom menu based on custom dialog
Choose → in the custom menu tool bar.
Enter
/MySite/authorin the Menu Path field of the Custom Menu editor.Enter
written by Olivierin the Formatstring Before field located on the right.Click on the Add button at the top.
Notice that upon adding the new entry, it is listed at the bottom of the Menu path list:
Click on the Save button. This will add the menu to the Custom menu tool bar:

Note that the new menu is placed at the right end of the custom menu tool bar. When closing Bluefish and relaunching it, it will be placed in alphabetical order, except that the Replace menu will always be at the far right side.
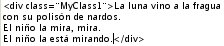
In another example, you have a string you often need to set before and after some block of text, for example <div class="MyClass">YourBlockOfText</div>. To do it:
Open the Custom Menu Editor
Enter
/MySite/div with classin the Menu Path fieldEnter <div class="MyClass"> in the Formatstring Before field
Enter </div> in the Formatstring After field
Click on Add, then on Save. The item will appear in the menu.
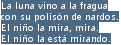
If you select some text:
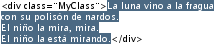
And activate this menu item, the first bit of text is now added before the selection, and the second bit after the selection:
Suppose you want to improve this last example. You have both MyClass1 and MyClass2 and want to be able to choose the desired class when activating the menu. Here's how to do it:
Open the Custom Menu Editor
Browse the Menu path list to retrieve the /MySite/class with div entry and click on it to make appear its components in the Menu Path and Custom Dialog fields
Click on the top arrow of the Number of Variables pop up menu to get 1 in the field. As you see a Variables entry appears where you can enter the name for variable %0. As name we enter MyClass number
Now change the FormatString Before field to take this new variable into account, as following: <div class="MyClass%0">
Click on Apply so that your changes will be taken in account, and click on Save to update the menu.
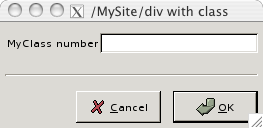
If you now activate this menu after having selected a block of text, you will be presented with a new dialog asking you for the value of MyClass number:
After entering the desired value, the same process as before will occur, using the value you provided. Here we have entered 1 as value:
![[Tip]](imgs/tip.png) | |
You can use the Return and Tab keys to format the output. Any variable can be used any times you want in the dialog. |
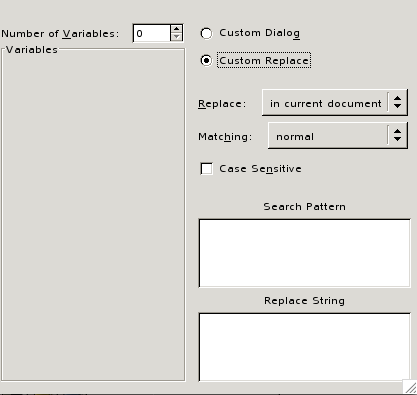
Find and replace items are no different. The dialog has some more options, each of these options corresponds to the regular Replace dialog. Again you can use variables like %0, %1 etc. to make a certain menu item more flexible.
Say you want to add title tags to a selection in a HTML page so that the user agent could render it either as a tool tip or as spoken words. To ease the discussion we will work on the following snippet of code:
<ul>
<li><a href="progsys01.html">Process scheduling</a> - 26/10/2002</li>
<li><a href="progsys02.html">Fork and Wait</a> - 02/11/2002</li>
</ul>
We will transform it into the following one:
<ul>
<li><a href="progsys01.html" title="blah Process scheduling">Process scheduling</a> \
- 26/10/2002</li>
<li><a href="progsys02.html" title="blah Fork and Wait">Fork and Wait</a> \
- 02/11/2002</li>
</ul>
where blah is any text you want.
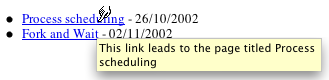
The initial rendering:

will be transformed as is:
To do this, we need to express the <a href="yoururl">yourstring</a> part of the initial snippet of code as a Perl regular expression (see Section 5.3, “Find and Replace Using Regular Expressions” for full details):
a href=" will be expressed as is and embedded into parentheses to retrieve it as \0 variable.
yoururl will be expressed as ([^"]+) to match one or more non double quote characters and retrieve it as \1 variable.
The second double quote will be expressed as is and embedded into parentheses to retrieve it as \2 variable.
The second > sign will be expressed as is and embedded into parentheses to retrieve it as \3 variable.
yourstring will be expressed as ([^>]+) to match one or more non > characters and retrieve it as \4 variable.
</a> will be expressed as is and embedded into parentheses to retrieve it as \5 variable.
Thus, the search string will be: (<a href=")([^"]+)(")(>)([^>]+)(</a>)
The replace string should be of the form: <a href="yoururl" title="yourvariablestring yourstring">yourstring</a>
Expressed as a regular Perl replacement expression, it will be as simple as: \0\1\2 title=\2%0 \4\2\3\4\5 where %0 will match yourvariablestring, that is the value entered in the Title field of the Replace dialog at activating time.
Procedure VII.3. Adding a custom menu based on replace dialog
Choose → in the custom menu tool bar.
Browse the Menu path list to retrieve the /Replace/Convert in Selection/<td> to <th> and click on it to make appear its components in the Menu Path and Custom Replace fields.
Change the Menu Path to /Replace/Anchor/Add Title.
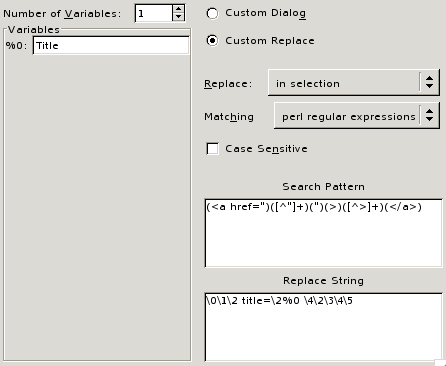
Click on the top arrow of the Number of Variables pop up menu to get 1 in the field. Enter Title in the %0 Variables field.
Change the Matching pop up menu to perl regular expressions.
Change the Search Pattern field like this:
(<a href=")([^"]+)(")(>)([^>]+)(</a>)Change the Replace String field like this:
\0\1\2 title=\2%0 \4\2\3\4\5
Click on the Add button.
The Custom replace dialog should have the following appearance:
Click on the Save button.
To use the new menu item, select the lines to be changed in the HTML file and activate Replace/Anchor/Add Title in the custom menu bar. Fill in the dialog as follows:
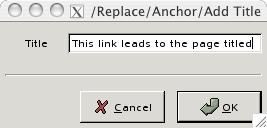
Click OK to proceed.